
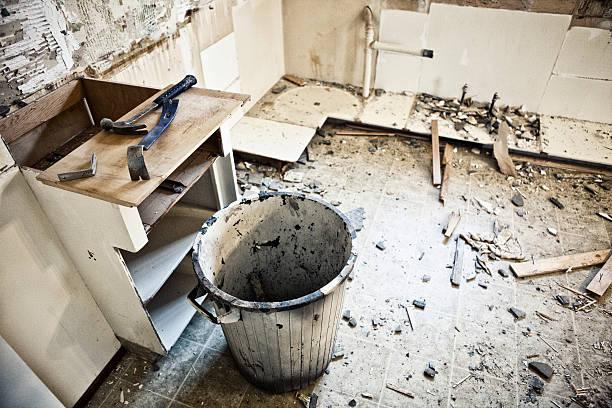
Getting a new kitchen is an exciting process, but before you can install it, you must first remove your old one. Removing outdated cabinets is a simple operation that anyone can accomplish. It only takes a few simple tools to complete. When removing old cabinets, you should always have assistance. You may need the assistance of a friend or two. You may find it easy to remove the base or floor cabinets on your own, but you will require assistance in removing the wall cabinets.
Getting started
To begin with, disconnect all utilities and appliances. Turn off the gas, water, and electrical fixtures and clear the space around them while naming each of them so that people do not damage them during the cabinet removal process. If you are unsure at any point, seek assistance from a skilled professional.
Turning off the gas, water, and electrical equipment is an important step that needs to be done before removing them from the kitchen. This will ensure there are no leaks, property damage, or risk to your safety.
Electrical connections to appliances may simply be plugged into a wall socket that is easily unplugged. Some appliances, however, are ‘hard wired’ into fixed connections and must be unplugged and made safe by a competent person. Only a qualified technician should disconnect or move gas appliances and supplies.
Setting Up A Temporary Kitchen
Kitchen renovations might take weeks depending on the size and scope of the project. So, if you’re going to survive it, it’s a good idea to set up the kitchen equipment in another room that you can use to prepare your meals.
Before removing the kitchen cabinets, you will want to place your kitchen equipment, such as a kettle, microwave, toaster, and refrigerator, in another room and close to a power supply for ease of use. You can also move enough cutlery and plates for everyone in the family, this way you will have an easy time cooking and serving your family as the renovation is going on. (B&Q Club, 2021)
What you need to know about Your Kitchen Cabinets before Removal
When removing your kitchen cabinets, it is important to determine what type of cabinets you have especially if you intend to repurpose them for another use.
Open your cabinet and look at the back to determine the sort of cabinets you have. You could find that you have ready-made cabinets that you should be able to reuse if you properly remove them. You can easily identify ready-made cabinets by checking if the material at the back is the same as the cabinet sides.
The cabinets are not suitable for repurposing if the back of the cabinet is your wall.
| Type of Cabinet | Description | How are they attached? | Good to reuse? |
| Prefabricated Cabinet | Newer cabinets include their own back. Individual parts are typically fitted together to form a complete cabinet set, but they can be detached and used separately. | Screwed into the wall usually via the rear of the unit or around the corners. | Yes. |
| Unitized Cabinet | These unitized cabinets are built in place with the existing house wall as the back of the cabinet. This cabinet style is popular in homes older than 25 years. | Either nails or glue. | Not usually. |
(Source: Budget Dumpster)
How to Remove Kitchen Cabinets
Once you’ve determined what kind of cabinets you have, proceed with the removal methods below.
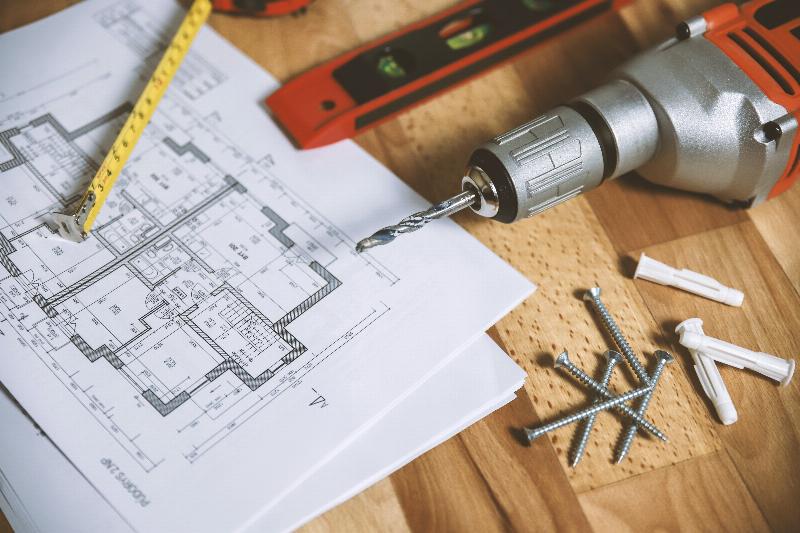
Step 1: Gather Tools and Supplies
The majority of the tools you’ll need to remove your cabinets can be found in your standard toolbox. That’s great since it means you can begin your project whenever you’re ready, rather than having to run to the home improvement store for special tools.
| Tools | Supplies |
|
|
This is also a good opportunity to think about how you’re going to get rid of the debris. If you intend to keep the cabinets after removal, make sure you have enough space to store them. (Dumpsters.com, 2021)
ProTip Takeaway: Consider renting a 10-yard dumpster if you’re disposing of cabinets or planning a major kitchen makeover. This will help you to avoid having to wait for your city’s bulk waste collection day.
Step 2: Prep the Area
It’s time to get started, but don’t get too far ahead of yourself. Before the screws start coming out, there are a few things you need to perform. These activities are quite easy to do and are also necessary for a successful job and will help you keep the surroundings clean and neat while you work.
- Empty your cabinets.
- Clear everything from the countertops.
- Shut off utilities to the kitchen.
- Cover the floor and countertops with tarps.
ProTip Takeaway: To avoid scratches and other damage, use furniture pads or blankets to protect your countertops and lower cabinets.
Step 3: Prepare the Kitchen Cabinets for Removal
Before you remove your kitchen cabinets:
- Ensure that you empty your cabinets.
- Examine your cabinets for any concealed electrical connections and ensure that they are disconnected.
- Remove cabinet doors by unscrewing the hinges from the cabinet with the drill so that the hinge remains with the door. If you’re not going to reuse your old cabinets, use a crowbar to remove them much quicker and ensure you wear gloves and goggles for protection.
If you are removing kitchen cabinets to reuse them, take the following precautions:
- Collect any loose screws or hinges from each cabinet and place them in a plastic bag or container. Attach the container to the cupboard to keep materials together once the cabinets have been removed from the walls.
- If you intend to replace the cabinets in the same spot, label or number them with tape before removing them. This will assist you in keeping them in order and avoiding misunderstanding later on. (HGTV, 2019)
Step 4: Disassemble Cabinet Fixtures
When removing the body of the cabinets, start with anything that might move or get in the way. This includes the following:
- Doors: Remove the bracket from the cabinet body, leaving the hinge attached to the door.
- Shelves: Unscrew the bracket from the cabinet body or pull the shelf from the support peg.
- Drawers: Pull the drawer out completely, then lift and continue pulling. If that doesn’t work, remove the movable bracket from the drawer.
How to Remove Screwed-On Kitchen Cabinets:
- Begin by removing the screws towards the bottom and work your way up, removing all screws. You must be prepared to raise the cabinet away from the wall when you remove the final screws at the top.
- As you remove the screws from the cabinets, support the weight by laying pieces of wood beneath the cabinet or have someone help you to support them. This is necessary if you want to remove the cabinets without damaging them.
- Repeat these steps if necessary until all units have been removed.
How To Remove Glued Kitchen Cabinets:
You will first have to check whether your cabinets are unitized or were fastened with nails and glue rather than screws. If this is the case you’ll need to remove them from the wall with a hammer and pry bar.
- To protect yourself, put on gloves and eyewear.
- A key point to note is that: The cabinet will fall onto the counter below once you remove it if there is no support system to hold it. You can have someone help you during the cabinet removal process.
- Begin on the cabinet’s sides, wedging the pry bar or crowbar between the cabinet and the wall with the hammer. Pry directly over a stud whenever possible to avoid damaging the drywall. To avoid damage, place a wooden block between the crowbar’s lever and the wall.
- Next, if the cabinet is still attached, move to the top, bottom, then back through the front of the cabinet and continue to pry the cabinet from the wall unit you feel that the entire unit is loose enough to be removed. (Lucas Craftsmanship Inc. 2020)
ProTip Takeaway: To avoid damaging the wall, use a stud finder and pry on top of any hidden studs beneath the cabinet.
Step 5: Raise and remove the cabinet
When you think you’ve completely detached the cabinet from the wall, gently lift it up and pull it away from the wall. Take your time throughout this process to check if there is any remaining glue that hasn’t come loose or if you missed a screw. Once the cabinet has been completely removed, remove it from your work zone to make room for the remaining cabinets. (Budget Dumpster, 2018)
Read Also: Should White Cabinets Match White Walls?
Are you ready to repair your Kitchen Cabinets?
Removing kitchen cabinets can be a difficult task if you lack the required tools, knowledge, or assistance. If you are looking for experts in cabinet removal in Houston Texas, Smart Remodeling LLC is the company to contact. Our competent team is experienced in the removal and installation of large and small cabinet systems. We treat each project with great care and our dedication to service and craftsmanship is unrivaled.
We collaborate with you to identify your cabinetry requirements and design solutions that complement your sense of style. As a full-service home repair company, we can also address other repair concerns that may arise along the way to help you in your home remodeling journey. Contact us today and schedule a free consultation.